How do you pack a bike for checking it into an airplane?
What boxes and cases are there, and which make sense?
Is it worth the money and extra fees?
Here is my pre-planning and experience, and how I beefed up the bag I chose with anti-crush-poles, in an easy and removable way.
Intense research made me choose the Evoc Road Bike Bag Pro.
– Relatively light at net 13kg.
– Only requires to remove pedals and wheels – handlebar/derailleur stay in place.
– Folds up when all reinforcement beams are removed – easy storage.
– Similar to the Elite Borson, but I liked the hard top shell better, with its possibilities to easily improve structural stability from the inside (point 10 on list below).
– Rolls like a pro, and is as easy to handle through the airport as my cabin roll-on, even fully packed and at 27kg total (Bike Bag, bike, accessories, clothing).
1. Document your seat height, your way. Then drop down seat really low, because a really hard push on the top shell could bend the bag inward as it flexes a bit, and thus potentially break carbon saddle shell or its rails, if the saddle is very close to the top of the case.

2. Remove Pedals. Clean all four involved threads, while you are at it.
Pedal wrench plus two pedals fit easily in the provide pouch on the inside of the bag, along with some grease for re-assembly, in a zip-loc (think ahead – and keep the inside of the pouch free of grease 😉 ),
3. Remove the wheels, drop tire pressure (paranoia, I know), put them in the provided wheel bags, set them aside for now.
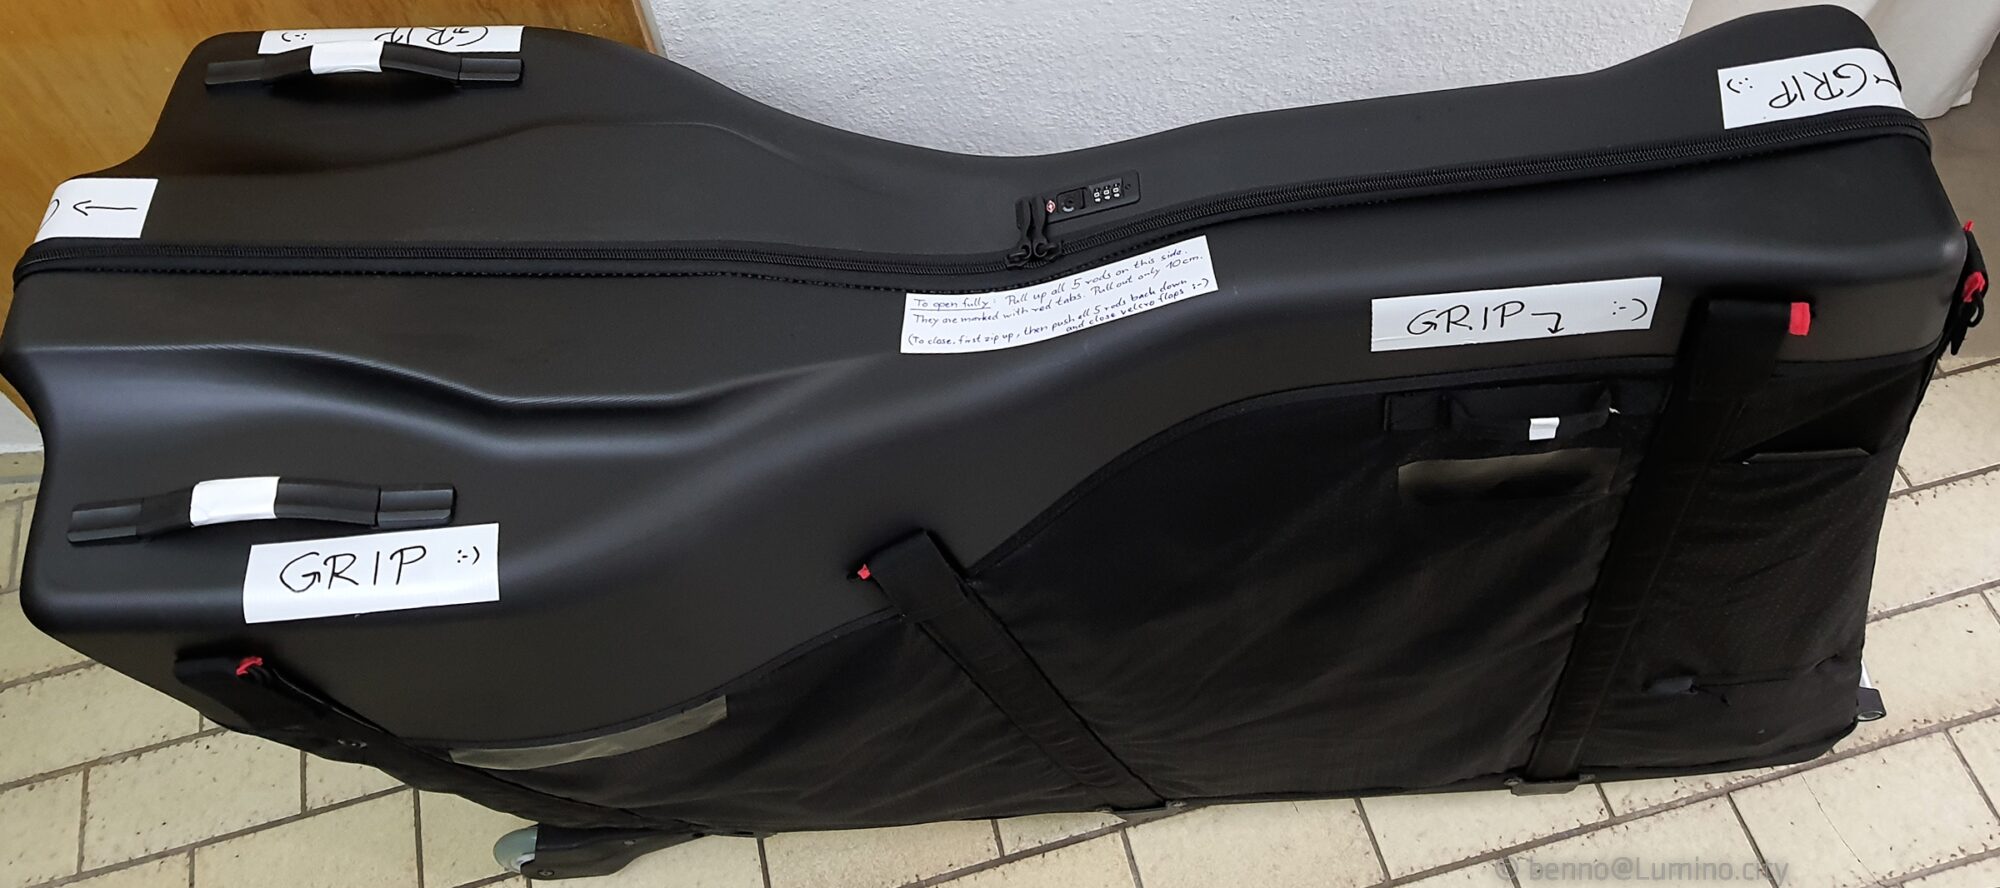
4. Set bike frame loosely on the dummy axles on the rack, to figure out the best height for those axles – the big chain ring needs to clear the floor. Low-as-possible/high-as-needed is key here.
After that, I zip-tied the dummy-axles in position, so they can not fully slide out of the rack/ black brackets sideways. Memory-ties 😛
5. In this particular bag, I found the bike can slide left and right quite a bit, because the construction of the rack allows for lateral movement. Not sure if that is common, but it needs to be addressed if you want your derailleur and hanger arrive un-bent.
My rear derailleur ended up sitting way too close to the black rack-bracket, hitting it when the bike frame slid left.
So I cut some spacers from 1″ (25mm) water pipe, and slid them over the dummy axle.
Now, the inside of the drop out of the frame will take any impact, keeping the derailleur well clear of any obstacles. This might apply to other bike transport bags as well, so, keep an eye out for these pitfalls.
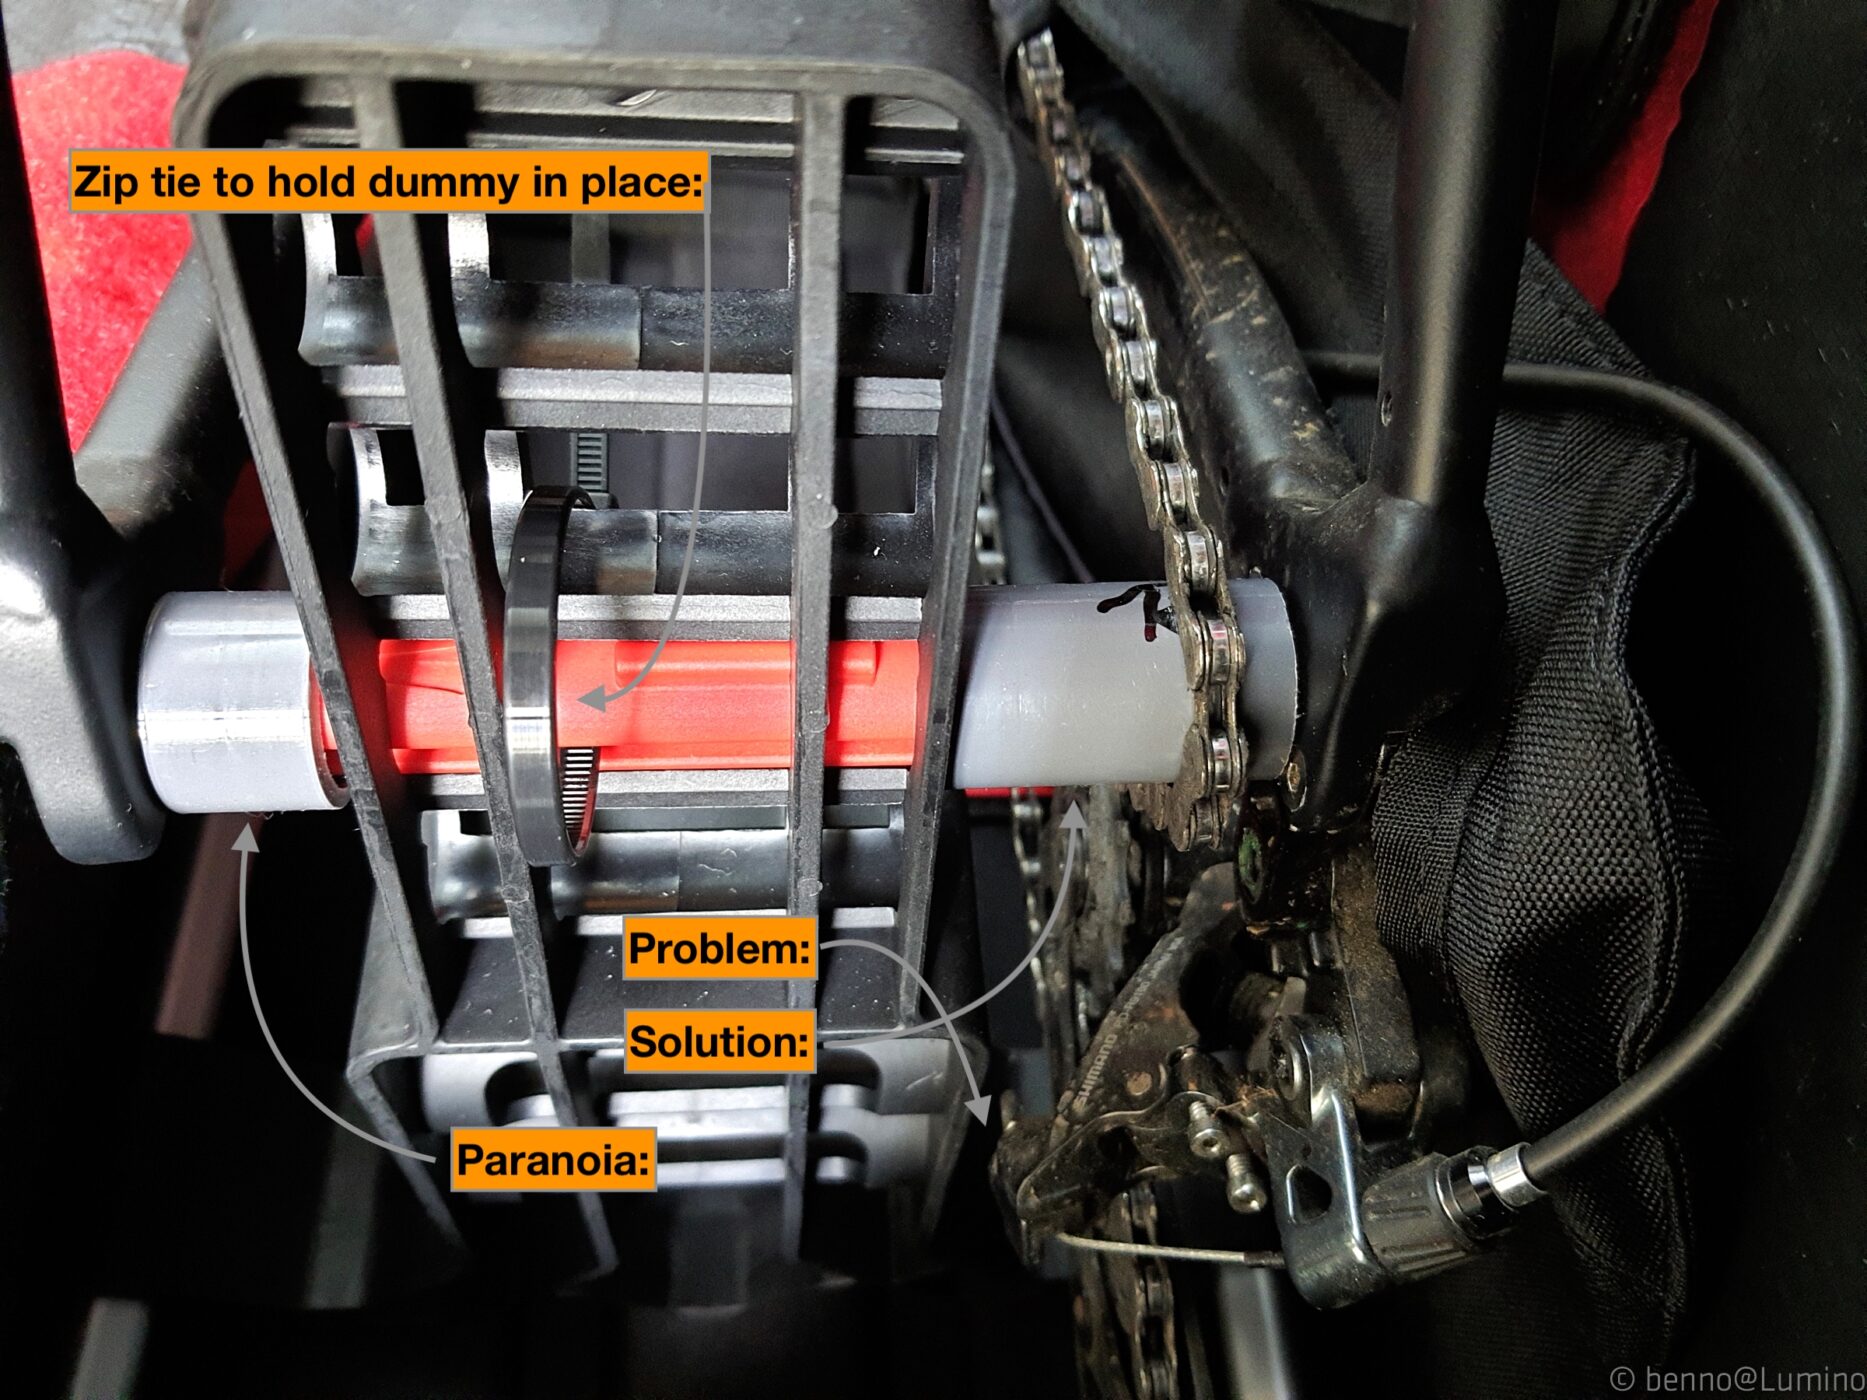
6. Next, I fixed the frame via my axle-spanners to the red dummy axles, while adding (paranoia) an extra, solid steel derailleur guard to the right side of the rear spanner.
7. If you want, wrap a designated cover around chainrings and rear derailleur (and/or -guard), or keep the chain from slapping and mucking/marking the chain stay some other way.
Also, I fixed the left crank to the left stay, just to keep the drive train from moving and turning (I used tape here, but a velcro strap on the return flight).
8. I added a frame bag for some fluids to pack in there for the flight (squirt/chain lube, sun screen, liquid detergent….) and to have a container for long rides/overnight needs on location.
This particular bag can actually also be mounted upside down on top of the top tube, keeping the frame triangle clear for two bottles for longer rides (Topeak makes them, not sure what model that is).

Make sure the two red compression straps go all around the two bottom aluminium-rails, to really set this thing up in the middle of the bags’ bottom shell. Those are common with most frame bags, even hard cases.
Also route those straps clear of any cabling (i.e. see rear brake cable near the seat clamp).
9. Roughly measure/expand the provided velcro-fixed crush-guard, position it close to the fragile parts of the rear. Allow for some fore/aft movement of the rack inside the bag.
If your case or bag does not come with a crush guard, you might want to think about making one – side impact of other heavy luggage can bend even some hard shells.
10. In case some other heavy luggage crashes into my bike bag, I installed a top-to-bottom rod in front, secured to the black rack-bracket with a zip tie on the bottom.
Then two rods across, with T-pieces on their ends to distribute incoming force over a wider surface, and secured those to the handle bar and hoods.
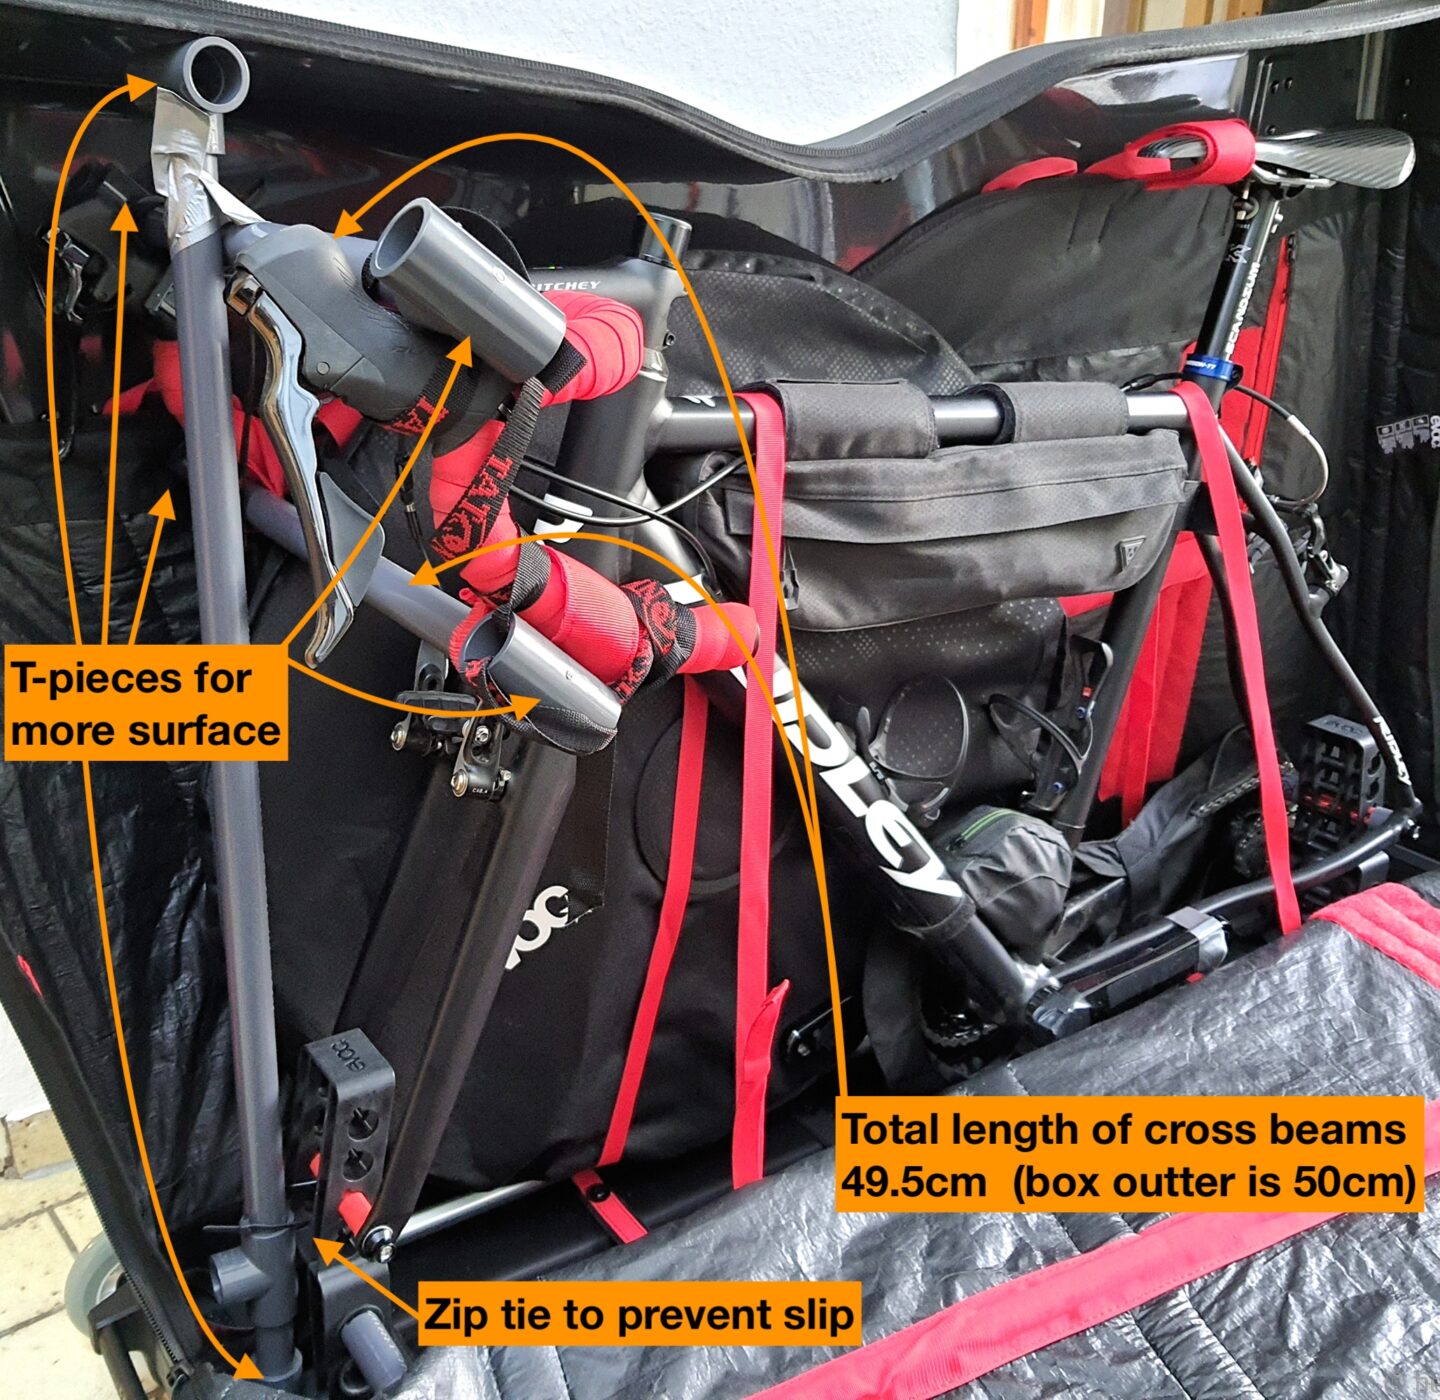
11. A second top-to-bottom anti-crush pole in the back followed, padded with a piece of rubber band (1cm thick) against the saddle, while loosely strapped to the back of it, so the pole can not sway left or right.
Zip-tied to the rack-bracket on the bottom, to prevent slippage there, too (it is meant to take an impact, not to slide away).
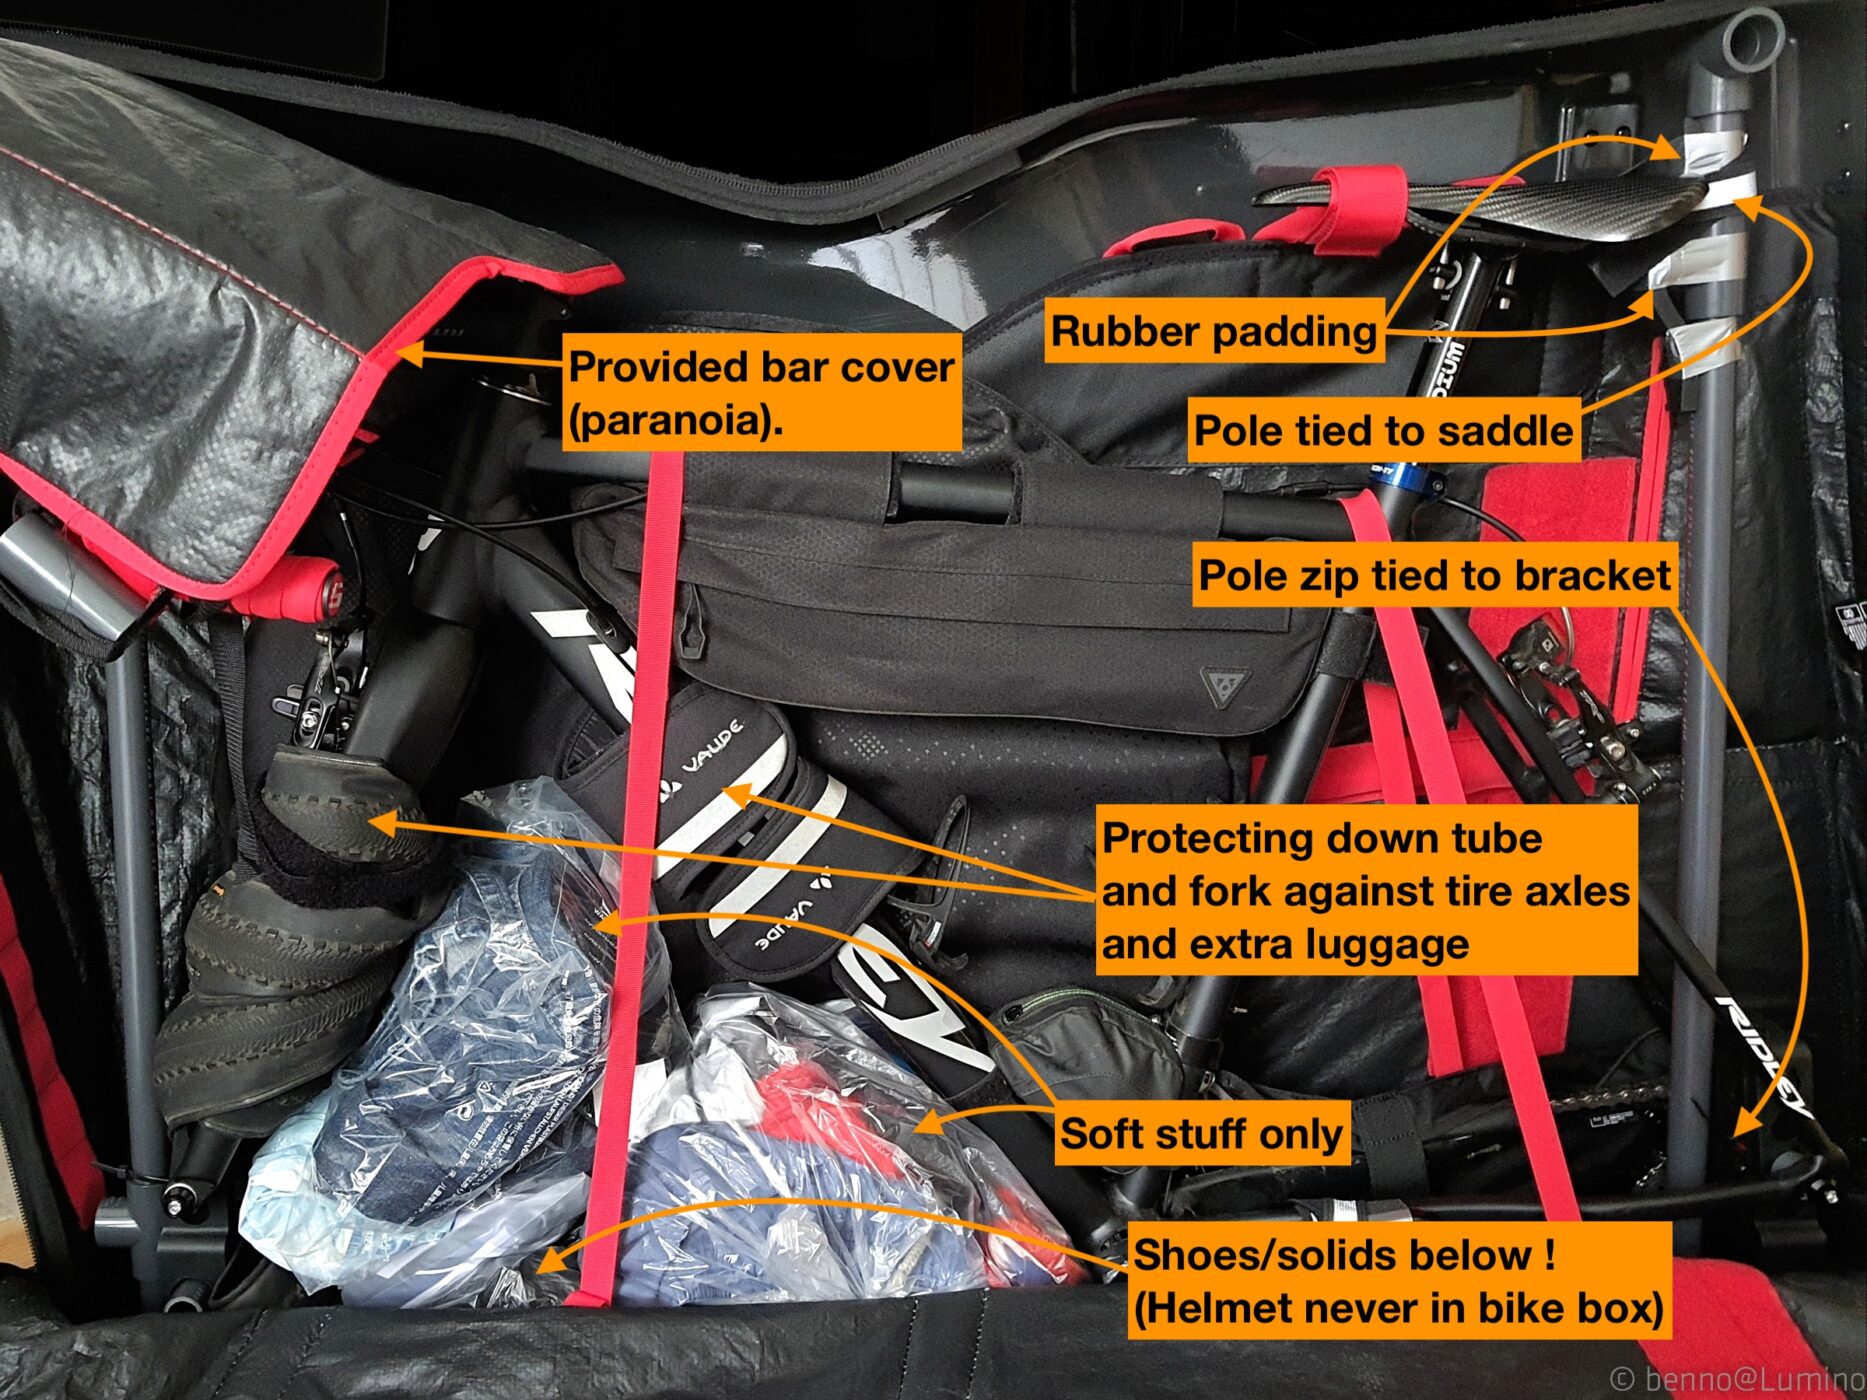
12. I then wrapped the front fork in a spare tire to protect against rubbing/hitting of the extra luggage I will put in the bag, and I cushionned the down tube as well.
This way I dared to put bike shoes in (in a clean bag, and below softer luggage), and some bottles second. I blocked their possible passage underneath the bottom bracket, by placing a tightly packed bag with cycling clothes in front of the BB.
Lastly, I placed more soft stuff in bags on top of that heap underneath the down tube, to prevent shuffling.
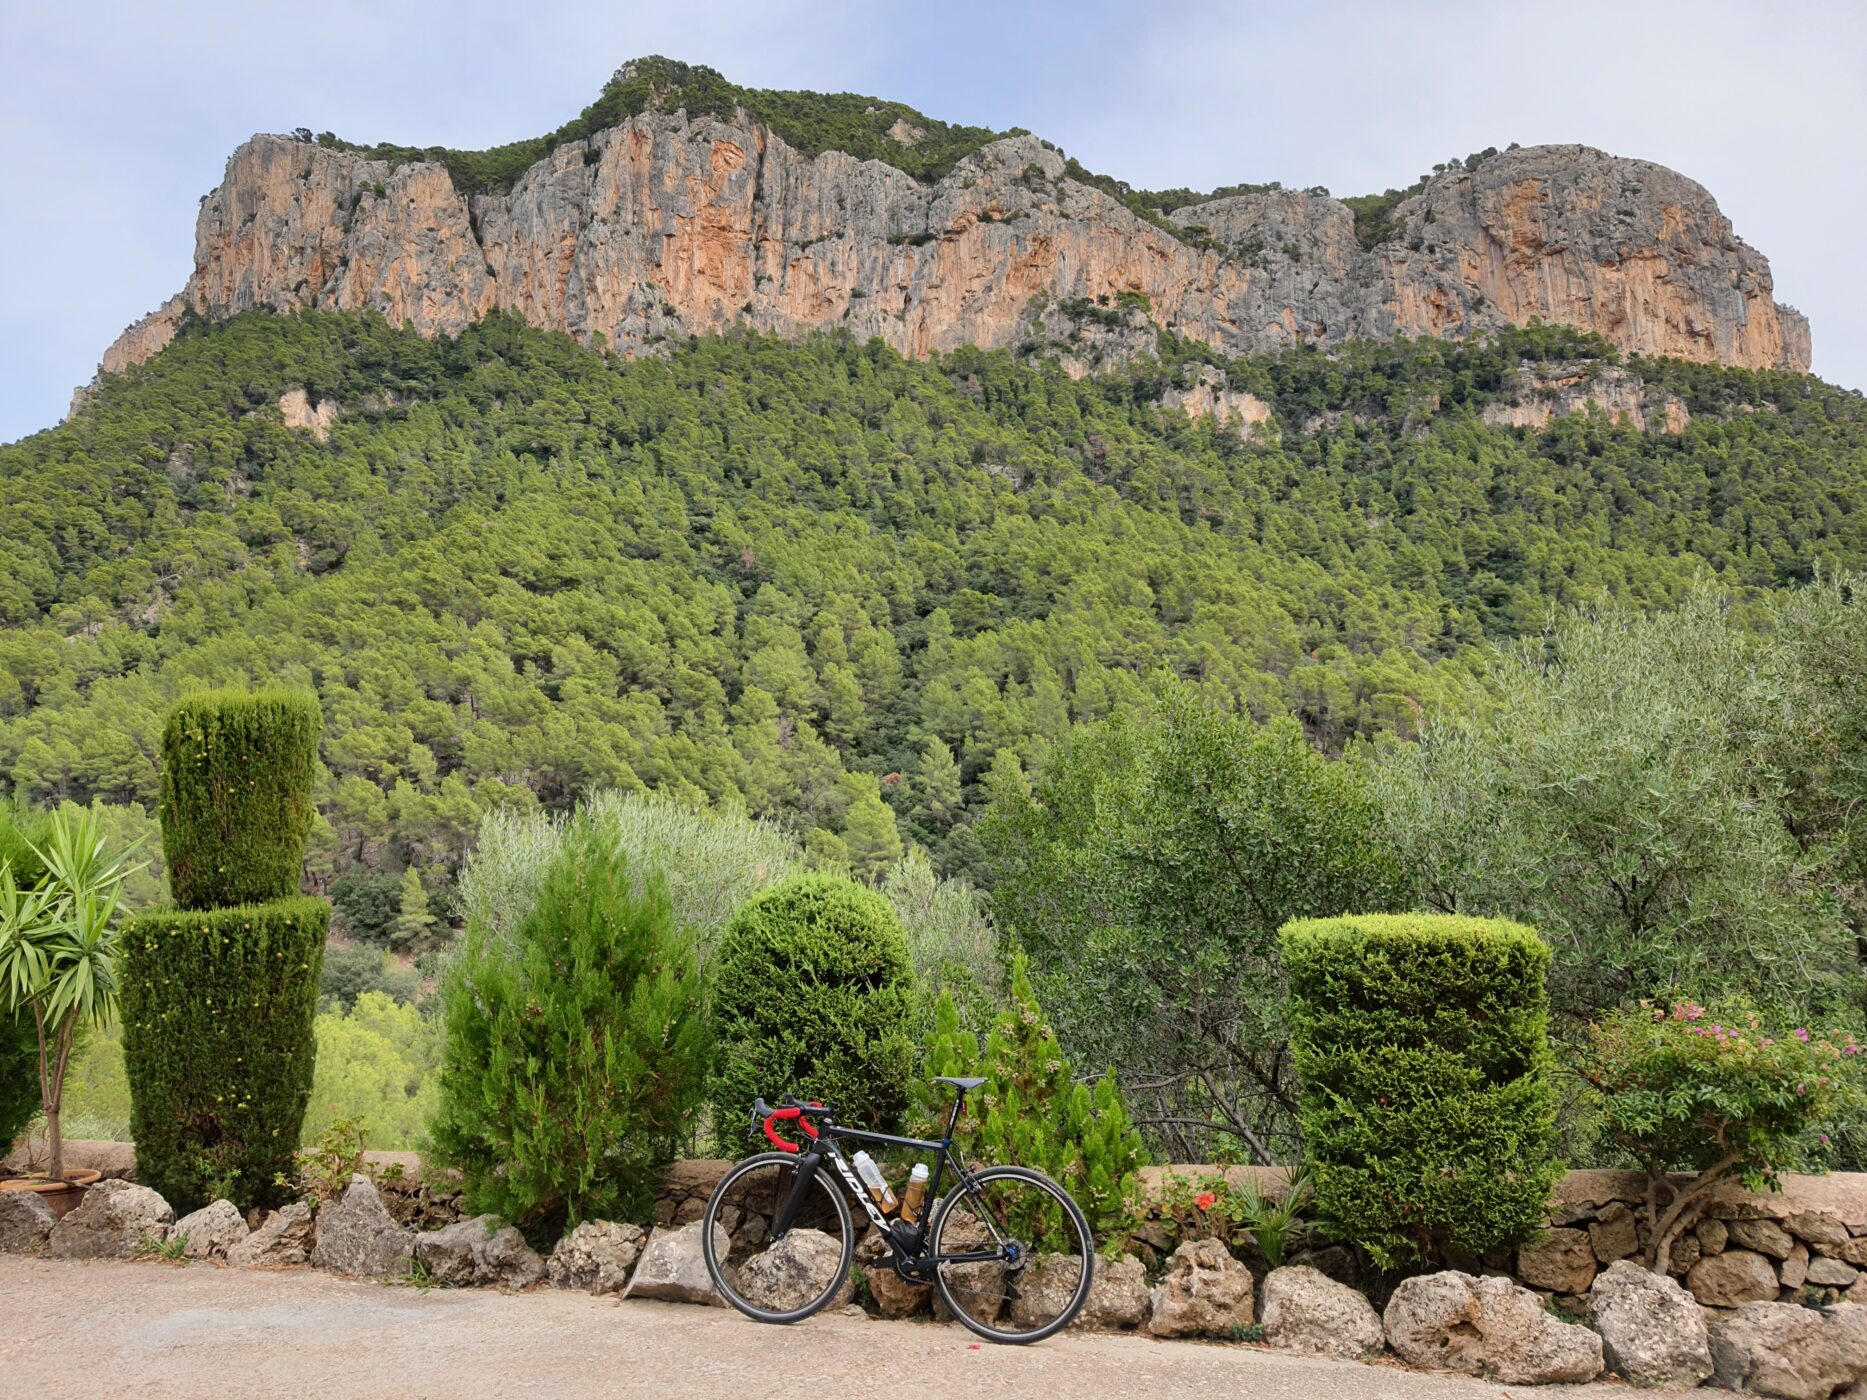
To finish off the prep, I marked the outside handles (black-on-black, not ideal for baggage handlers to find quickly) or grips in a friendly and bright way, and included a short note for anyone who might need to open the case for inspection (first picture).
Apart from the purchase of the bike box (varies greatly by brand, roughly available between 290,- and 900,- Euros) and water pipe pieces (38,- Euros total), the baggage fee depends on distance and airline rules. Within Europe (short haul), Condor charged 55,- Euros per direction for a packed bike up to 30kg.
How much is rent for a bike of this quality, per day? Per 10 days?
Will you bring your own pedals, and possibly even a saddle and a stem – after pre-checking the rental bikes’ geometries before packing for the flight there?
Been there, done that – and it also works fine, of course 😉
.
.